Google has recently announced that they will no longer be updating the Nik suite of image tools. This has caused much angst among photographers, to the point that a petition on change.org now has more than 12,000 signatures (including mine).
For some years now, I've been using Nik's Silver Efex for black-and-white conversions. It has a really useful set of preset looks built-in that provide great starting points for developing black-and-white conversions from colour raw files. Currently, Silver Efex Pro 2 still runs on my Mac (OS X 10.11.6), but we don't know how soon operating system upgrades etc. will scupper this.
So I have begun going back over previous favourite methods of converting to black-and-white and seeing what still make sense, and could make good replacements for Silver Efex Pro. I've concentrated on Lightroom and Photoshop -- they are my standard developing tools -- and so far I've not explored some of the other more recent options such as Macfun's Tonality or Topaz B&W Effects. I think I've got to that stage where I would rather work with existing tools that I already know rather than head off again into the unknown.
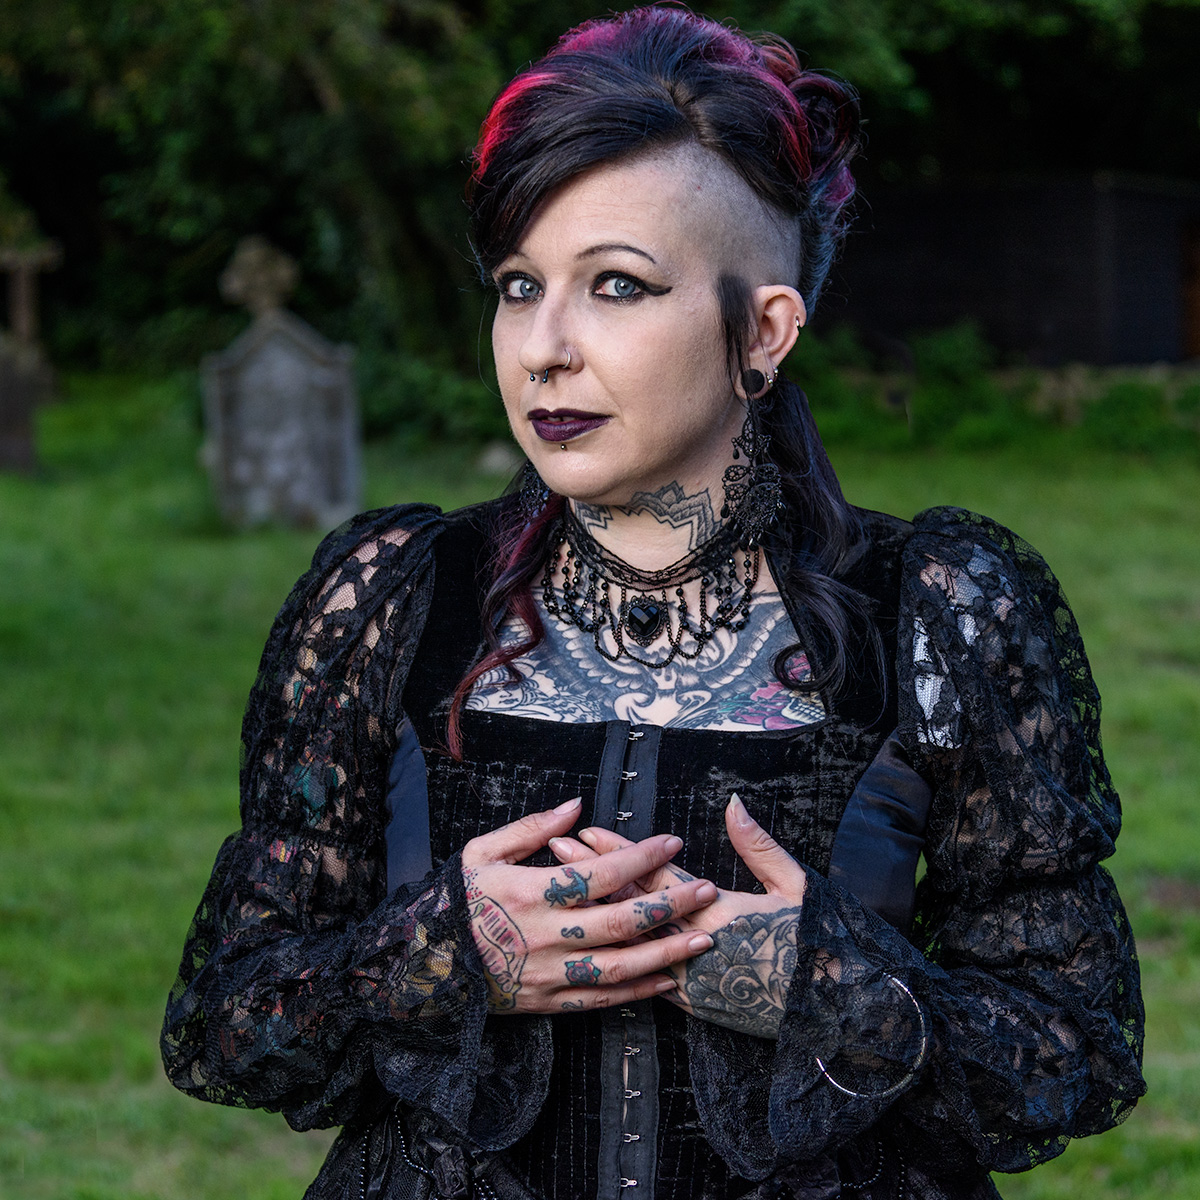
Fig. 2. The basic colour version
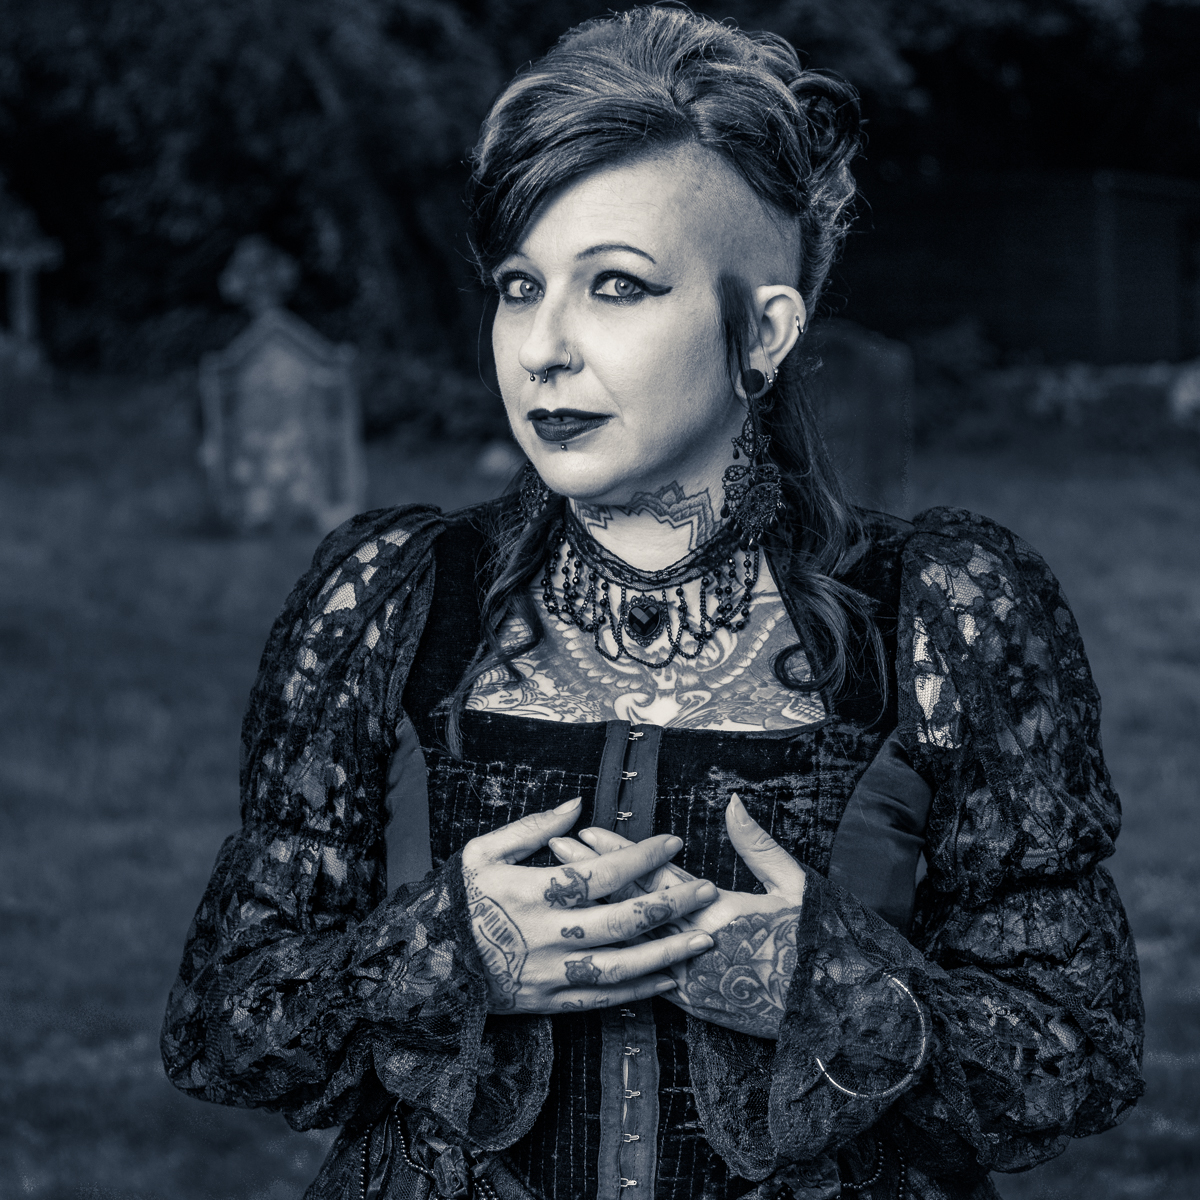
As an example, I've been working with a picture (Fig. 1) from a recent shoot with Natasha Bizzarra. The original picture was taken just before dark in a churchyard, with Natasha wearing an elaborate Victorian-style costume. There was very little light left, so nearly all the light on Natasha comes from a SB900 speedlight in a small soft box placed camera left. You can see in the colour original (Fig. 2) that there is detail from the background as well: some gravestones and other details. To me, the colour image does not convey the atmosphere that I wanted to get, and I shot the picture with a black-and-white conversion in mind.
At the top of this page (Fig. 1) is a conversion done in Silve Efex Pro 2: from the colour image developed first in Lightroom, I took the picture into Photoshop, duplicated the background layer, converted it into a smart object, and then launched Silver Efex Pro 2 from the Photoshop Filter menu. (Working with a smart object layer means that the Silver Efex results remain editable and are not simply baked in). Going through a set of presets, I chose the Full Dynamic Range preset, followed by local adjustments to contrast and structure using the wonderful U-points) and putting on an orange filter overall. I also added a slight split tone. I think the result is a really interesting slightly mysterious picture.
Fig. 3. Lightroom version
The next version, I did a wholly in Lightroom (Fig. 3). One of my favourite tricks in Lightroom is to go to the HSL panel, and drop the saturation sliders all to zero. This takes all the colour out of image, but the luminance sliders remain active. This means that using the picker tool, it is possible to increase or decrease the luminance of particular areas of image based on their original (and now invisible) colour to change tonality. All the other controls in Lightroom remain available so clarity, vibrance etc can all be applied to the image, as well as any number of selective adjustments.
I think this works pretty well, although I still prefer the Silver Efex Pro version.
Fig. 4. Photoshop HSL/colour blend version
The final version is done in Photoshop. This method sounds a bit complicated, but it's really very easy. After opening the picture in Photoshop, I put on three layers above. The first layer above the image is a Hue/Saturation adjustment layer. The next one is a layer filled simply with black, with the blend mode set to Colour. The top layer, which is optional according to your taste, is a Curves layer. I made an action ages ago that simplifies this, so one click sets up all the layers and put all three into a folder for tidiness.
The layer filled with black and set to Colour blend mode takes all the colour out of the image, and only shows through the luminance values of the underlying picture layer. The HSL layer allows changing those luminance values by sliding the Hue slider. This one slider is all that is needed to change the tonality of the monochrome image. The simplicity of using a single slider appeals to me a lot! By sliding the Hue around, it's possible to lighten or darken skin tones, lighten or darken the background and so on. This is actually an extremely easy way of interpreting a picture. As needed, a second (or third etc) HSL layer can be added with the effects masked in, so as to achieve the requisite tonality in all parts of image.
Very often it's good to control contrast, or to lighten or darken further parts of image, and this is where the curves layer comes in. I like to have the curves layer perhaps to push details out of the shadows, alter the skin tones etc. The version here represents the HSL/Colour blend mode method.
One further addition to the picture is a split tone effect, to try and add a little creepiness to the atmosphere. I've put a dark blue tone on the shadow areas, and a warmer gold-ish tone the highlights.. I usually do this kind of finishing in Lightroom; split toning is very easy in Lightroom (it handles PSD files) and I do most of my JPEG exports from it, so that is the simplest thing.
Of the three conversions, I still prefer the Silver Efex version. But actually, the others are quite close, and with a little more work could get very close to the Silver Efex version.
Just one further point: Silver Efex Pro also did very nice borders around pictures. You could put on something that was just a plain line or make it look rough, for instance, like it had been printed from a negative using and enlarger with a filed-out negative carrier. On1 Perfect Effects Free has a set of borders which are really useful: although these are not as simple and intuitive to use as those in Silver Efex Pro, make fine substitutes.
So for me, the moral of the story is that while Silver Efex Pro 2 will be a loss, it's not the end of the world – but while I can still use it, I’ll carry on with it.


